Wednesday, October 29, 2014

Cheesecake Ice-cream with Confiture de Lait

Cheesecake Ice-cream with Confiture de Lait 


I love Cheesecake made with Cream Cheese. Its creamy and delicious but then again till now all the Cheesecake that I have made were baked and contained eggs. I was in a real fix when I came over to Bombay for a few months since I neither have an oven in this temporary house nor does my other half eat eggs and once one has had the baked cheesecake the unbaked ones seem incomplete . I was reluctantly thinking of making eggless bakeless cheesecake when the idea of a Cheesecake Icecream came to my mind.

Truth be told a lot of people indirectly contributed to this dessert. Some months back Nazneem, a lovely lady had posted about Dulce De Leche on a food group and it immediately caught my attention. This was back in September and then there was one festival after the other which meant that I was busy making traditional Indian desserts such as the Bengali Cootage Cheese Jalebi, Bengali Gulab Jamun called Pantua, Kalakand, Malai Chomchom etc , the recipe for all which you would find in this blog's Dessert section.
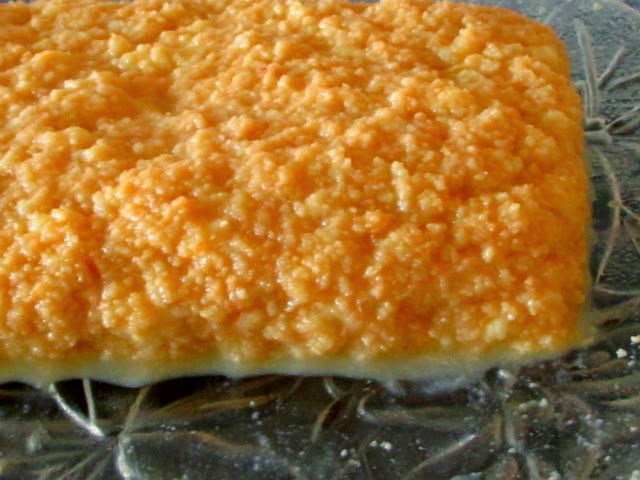
Confiture de Lait 


Anyway coming back to the recipe I made my own Confiture de Lait aka Dulce De leche which in simple English is called Milk Jam. Its a creamy reduced caramelized milk.

Many people take a can of condensed milk and steams it till its caramelized but I for one like getting to the bottom of a recipe and more importantly I am not too fond of shelved packaged fresh food and when you make your own Milk Jam you can add a bit of Vanilla which gives it an amazing flavour .

I was in love with Confiture de Lait but the surprise was when my Cheesecake Ice-cream which turned out smooth creamy and amazingly rich and all this was made using a non-electric hand held whisk. This frozen delight had no ice-crystals at all.

This is a 2 day procedure and completely worth it.

So here is the recipe

Makes 3 to 4 serving

For the Confiture de Lait

1 litre whole milk
500gm sugar
1 tsp vanilla beans
1 tsp butter

For the Cheesecake Ice-cream

226gm aka 1 packet of Philadelphia Cream Cheese
200ml of cream
1 tbsp vinegar
2/3rd cup sugar
1/2 cup water Few drops of lemon
1/2 tsp vanilla beans

On the first day simply mix the vinegar with the cream and let the sour cream form for 24 hours at room temperature.

The Sour Cream after 24 hours of fermentation 


Now start with the Confiture De Lait. Remember that you would probably have a lot more confiture de lait topping than required but its delicious and makes for a lip-smacking spread on buttered toast or as a dip for apples etc.

The Final Confiture de Lait 


Take a heavy bottomed deep pan and add the milk, sugar , butter and vanilla and put it on the lowest flame possible and keep stirring every  7 minutes for the next 45 minutes. Make sure you use a broad spatula to scrape the bottom of the pan so that it doesn't stick to the bottom. Once the colour turns beige which takes about 1.5 hours from the start you must keep stirring it continuously to avoid burning the Confiture de Lait. Once done if the result looks grainy don'y worry about it. Just wait for it to cool down and blend it well and you have smooth creamy caramelized milk jam aka Confiture de Lait. Once cool put it in the refrigerator.

The next day bring the Cream cheese to room temperature . Just keep it at room temperature for an hour or so. I live in India and it takes very little time to soften the cream cheese but in case you stay in a cold country it might take you a bit of time. Instructions are provided in the pack on how to soften cream cheese. By now your sour cream would have thickened and ready to be used.

Make the sugar syrup by combining the 2/3rd cup sugar and water and add the lemon juice to prevent crystallization and then simply let it cool down.

Whisk the cream cheese, sour cream , vanilla beans with the sugar syrup. Add the syrup bit by bit and keep tasting so that you get the perfect amount of sweetness for your taste buds . Chill it for 2 hours in the refrigerator and then whisk it again and transfer to an air-tight container and freeze for 4 hours and serve delicious creamy smooth Cheesecake Ice-cream and top it with the Confiture de lait.

Important tips :-


  1. The butter added to the Confiture de Lait keeps the milk as smooth as possible 
  2. In my experience sugar syrup leads to a smoother consistency 
  3. The lemon juice added to the sugar syrup when making it prevents crystallization 
  4. Bring the Confiture de Lait to room temperature before serving. You should let it come to room temperature, 1 hour before serving. 


Wednesday, October 22, 2014

Khasta Kachori

Khasta Kachori 


 The festivals bring forth the joy of celebrations and celebration is incomplete without gastronomic indulgence. For The Festival of Lights , Diwali, here is some Khasta Kachori a popular snack from North India.

While growing up I have mostly seen my own family hosting luncheons or dinner parties. The truth is even if a guest was invited over for tea they were always made to stay till dinner which is why the idea of snacks was always neglected a little bit in anticipation of the exquisite dishes prepared for the main meals.


It was only during a particular celebration, when my grandmother would make these amazing Samosas for breakfast since for that occasion everybody stayed over from morning till evening.

By the time I grew up I had developed an intense passion for cooking which borders on obsession which in turn makes my grandmother extremely happy since I apparently remind her of her mother who would churn out immaculate delicacies from the kitchen.

Sitting far away from home I dedicate this to my grandmother and can't wait to go back home and make these for her.


Makes about 8 Kachoris :-

1/2 cup Split black gram aka Dhuli Urad Dal
Pinch of asafoetida aka hing
1/2 tsp Cumin seeds
1/4th tsp saunf
1 tsp red chili Powder
Pinch of turmeric powder
Salt as per taste
2 tsp coriander powder
1/2 tsp sugar
1 heaped tsp dry mango powder
2 tbsp melted clarified butter aka ghee
2 tbsp raisins

For the dough :-

2 cups of all purpose flour (cups used hold 210ml liquid)
3 tbsp non-melted clarified butter aka ghee stored in the refrigerator for 15 minutes.
Pinch of salt
1/2 cup ice cold water
The tiniest pinch of bi-carbonate of soda

Oil for deep frying

Basically making these kachori is one of the most easy things if you understand its characteristics.

Soak the pulse for a good 6 hours and then drain it of all the water and grind it to a paste.

Start with the dough. If you have made pie shell before you would know the concept behind using a lot of fat and ice cold water. This helps in creating the flakiness. Mix the flour and ghee to form a crumb like consistency and add salt and sprinkle water to create a firm dough and wrap it in cling film and put it in the refrigerator to chill for 1 hour.

The final filling minus the raisins 

Now heat 2 tbsp melted ghee and add the asafoetida aka hing, cumin seeds, saunf and then add the pulse and add the chili powder, turmeric, salt , coriander powder , sugar and mango powder and mix really well and sprinkle a bit of water and cook on low heat for 7 minutes to 10 minutes. Make sure it doesn't burn. You'l know its done when it starts leaving the side of the pan, add the raisins and once it cools divide it into 8 parts .


Now divide the dough into 8 equal halves and then make balls out of them and then flatten them a bit with the palm of your hand and roll out a little bit in a way where the center remains a bit thick and place the filling which should be almost the same size as the balls and now roll out the edges and then dip your hands in water and fold the dough to make a pouch and flatten it out so that you create a flattened ball.


Press the flattened balls against your palm  to increase the size but make sure no cracks are formed and once you are done with all 8 of them put them in the refrigerator for 15 minutes.


Now deep fry them on low heat till it turns into a brown colour on both sides. It takes about 8 minutes on each side but do check to ensure that it doesn't burn. You should ideally keep turning them so that it doesn't burn on one side.


Important tips :-


  1. The large amount of clarified butter results in flaky crispy delightful kachoris so please do not cut down on the amount 
  2. Fry at low temperature to medium temperature controlling it  at all times else you end up with burnt kachoris
  3. When you are sealing the Kahoris make sure there are no cracks 


Serve with some sweet and sour Sonth Ki Chutney . Recipe : Sonth Ki Chutney


Tuesday, October 21, 2014

Murgh Korma

Murgh Korma 


For years I have heard my grandmother and others of her generation indulging in nostalgia about the good old days when most dishes would be prepared in Pure ghee which has been replaced with refined oil. The first time I decided to give a dish a try with ghee alone it was a big celebration where we had invited a lot of guests and I cooked a delightful recipe of Chicken in it and my guests could not stop praising it even though the recipe was of course collected. It was from then on that I realized that ghee can never be repalced by refined oil.

On any regular day I would rather use Olive oil or extra virgin olive oil for my poached or boiled or steamed chicken but on those rare occasions that I make a special preparation I stick to ghee or in some other traditional cases I use mustard oil which has a full bodied flavour of its own. So these days I only use refined oil on those rare occasions when I deep fry some item.

The influence of Mughal cuisine is quite strong in the whole of North India and even though Bengal lies in the far east it has a strong influence of Mughal because the Mughal  rule had spread out to the Far east by the 16th century which is why most Bengali families have a strong affinity for Mughali cuisine. And not that when the Nawab of Lucknow had to relocate to Calcutta he brought along with him a culinary tradition which has stayed on in the beautiful city of Calcutta currently known as Kolkata.

While growing up I have mostly seen my father prepare a Mughlai Chicken preparation which he liked to call Mughlai Murgi which means Chicken cooked in the Mughlai style.  Much later when I stepped into adulthood and had by that time developed an intense passion for cooking I read in an article about the history of Chicken Korma and realized what my father would cook was essentially Chicken Korma except that he would add that one ingredient which most Bengalis have an intense love for and the one ingredient I hate using in dishes , the humble potato . So what I did was modify the recipe to suit my taste (with influence from that article that I read) by trying to keep it as close to the original Mughal recipe as possible and the result is a lip smacking dish. Cooked in pure ghee with the resultant thick gravy coating the succulent pieces of chicken it is indeed a dish I would suggest people to try.


400gm chicken (preferably leg + thigh)
1 large onion roughly chopped
1 tbsp ginger garlic paste as smooth as possible
2 green cardamom
2 cloves
100gm thick curd
100ml milk
3 tsp non-melted clarified butter
1 large bay leaf
Salt as per taste
1 tsp coriander powder
Pinch of cumin powder
3 dried red chilies
1/2 tsp red chili powder
1 inch cinnamon
Pinch of turmeric powder
1/2 cup water

Cut the chicken into medium sized pieces. Marinate it with half the ginger garlic paste for 1 hour. Now heat 2 tsp unmelted ghee and fry the chopped onions on low heat.

First cover the onions and let it soften and then open the cover and fry it on low heat till it reaches a golden stage. Take it out and let it cool down and in the meantime add 1/2 tsp unmelted ghee and seal the juices of the chicken on high heat till its browned on both the sides and switch off the gas and transfer the chicken to a plate.

Whisk your curd . Once the fried onion cools down blend it to a smooth paste . Now add 1/2 tsp unmelted ghee to the same pan and add the remaining ginger garlic paste and the onion paste and saute on low heat  for a minute and add the dried chili , cloves, green cardamom, cinnamon , mace , coriander powder, cumin powder and bay leaf and then add the curd keeping the heat to low and now you must keep stirring it continuously to prevent the curd from splitting.

Stirring it continuously bring it to a boil. It takes patience but is the only way to prevent the curd from splitting. Once it comes to a boil, add water and then add  turmeric powder, chili powder and salt and stir on low heat and bring it to a boil again and add the chicken and keep stirring and then cover and cook for 10 minutes and then add the milk , mix well and cook till the oil separates and the gravy becomes thick and coats the chicken. Let it rest for 15 minutes to absorb all the flavour and serve with homemade wholewheat flat-bread.

Tips


  1. Covering the onion when softening it speeds up the process 
  2. Take care to fry the onion to a golden brown colour but make sure you do not burn it else it will leave a bitter taste 
  3. Stirring the gravy continuously after adding the curd is essential to prevent the curd from splitting. 


Monday, October 20, 2014

Piyau Bare


Piayau Bare 


There is a saying in Bengali, 'Chena manush ke notun kore chena' (Getting to know something we already know afresh from a different perspective) This is exactly what had happened with me while I was engrossed in Adil .I. Ahmed's wonderful book, 'Tehzeeb - Culinary Traditions of Awadh' The book is not only a treasure of this aristocrat's family recipes but it explores a by-gone way of living.


I have always known that Bengal's cuisine is greatly influenced by many culture's cuisines, Awadh being a great influence. Its not as if Benga's cuisine is exactly like Awadh's but the influences are seen quite distinctly. Take the example of Egg Halwa, an egg based halwa dish which is very popular in present day Bangladesh which was a part of undivided Bengal and it finds its roots nestled in Awadhi cuisine.

When I came across the recipe for Piyau Bare  in the book I immediately felt that I know it and it immediately hit me that we have a variation of the same recipe in Bengal which goes by the name, 'Rosh bora' meaning juicy syrupy fritters. Piyau bare is more majestic with the use of saffron and Vetivier water aka Kewra  water and is served with cream which is completely left out in Bengal.

To be fair after making this extremely easy yet delectable sweet dish I actually find the creamy version even better than the one I have grown up with and it being Diwali its the Festival of Indulgence as well.


Recipe Source: The Culinary cookbook Tehzeeb

The author credits Saba Hasan for the recipe

I have reduced the quantities to suit my audience since we are 2 people in this house

1/2 cup of Split black gram
2 cups of sugar
3/4th cup water
Fat pinch of Saffron
1/2 tsp Vetivier water aka Kewra water
Vegetable oil for frying
100ml thick cream

Soak the lentil for a good 2 hours to 2.5 hours. The longer its soaked the fluffier it will be.

Now make a fluffy paste of the lentil by first draining it of all the water and grinding it with 1 tbsp of the water it is soaked in. Make sure you scrape the sides of the grinder so that it becomes a smooth fluffy consistency. The trick to getting a fluffier batter is to grind the already ground lentil a second time with 1 tsp water.

Now soak the saffron in 1 tbsp water and make a syrup by bringing the water and sugar to a boil and simmering it for 10 minutes or so. It should be of a single thread consistency. Add the saffron and Kewra water and simmer l for a few seconds.

Now heat oil and fry the fritters. Keep a bowl of water near you and dip your fingers in the water and scoop out a bit of batter and make a ball and fry it on low heat till it reaches a golden stage. I like mine the colour of gold but you can fry it a bit longer to get a brownish hue. Remember to never increase the heat else the fritters might burn. keep adjusting the heat between low to medium.

Once fried use a kitchen towel to absorb extra oil and soak the fritters in the syrup for about 10 minutes and take it out and then serve it topped with cream.

If you like your cream thick like I do whip it with a fork for 1 minute and put it in the refrigerator when you soak the pulse  so that by the time you serve it it is quite thick.


Enjoy a not so popular but exquisite dessert

This is part of Kolkata Food Blogger's Ongoing Event, 
Deepavali Festival of Lights with Sweets n Savouries 


Saturday, October 18, 2014

Kalakand

Kalakand 

(Indian Milk Cheese Fudge) 


It seems that right after the partition of India a 'Halwai' (Indian sweet chef)  named Baba Thakur Das who had migrated from Pakistan to Alwar, Rajasthan in India had started his day with experimentation with milk and having added lemon juice to the milk he was fascinated with the resultant cheese and legend has it that he uttered the famous Sentecne 'Arey ye to kala hai' (This is art) which led to the creation of a magnificent sweet dish, Kalakand a kind of Indian Milk Cheese Fudge. Freshly homemade cottage cheese is cooked with reduced milk till it reaches an extremely thick consistency which is milky, cheesy and completely lip smacking.


Now Baba Thakur's descendants say with great pride that recreating the original magic of the Kalakand produced at their store is impossible due to the water and the soil around Alwar which I believe to a certain extent but then again you can still make a gorgeous Kalakand which might not be as good as the ones created at Alwar but with a bit of patience you can create some lip smacking gorgeous dessert.


Before I give the recipe let me emphasize on the fact that certain desserts cannot be made easy by cutting down on time and effort else you shall simply not get the proper taste and flavour. The internet is filled with recipes which uses packaged condensed milk and a short cut method which wouldn't simply give you a superior taste. Believe me I speak from experience. A bit of hard work  is worth the effort. The entire process takes about 2 hour 15 minutes to make and another 1 hour to 2 hours for setting.

Makes 10 large sized Kalakand :-

2 litre full fat milk and yes it must be full fat
1 tbsp to 2 tbsp vinegar diluted with 2 tbsp water
5 to 6 tbsp sugar (please adjust the sweetness as per your taste)
3 green cardamom
2 tbsp blanched halved pistachios
2 tbsp ghee

Simply start of by taking 1.2  litre of the milk and add 1 tsp ghee to it. (The ghee helps in keeping the reduced milk smooth)

Start reducing it. Take the remaining milk and bring to a roaring boil in another pan and then lower heat and add the diluted vinegar and when the cheese forms in 2 minutes. You should have white masses floating in an olive green whey switch off gas once the entire milk is well curdled and then cover it and leave it for 5 minutes. Gather the cheese in a cheesecloth and drain it of its water. After 10 minutes squeeze out the excess water and crumble the cheese as finely as possible.

Meanwhile keep stirring the other pot of milk which you are reducing to avoid scorching the bottom. Once it gets reduced to half its original content add the crumbled cheese and crushed cardamom seeds along with the sugar.

The best way to add sugar as per taste is adding it little by little and checking the taste.

Now keep reducing the mixture of cheese and milk together stirring it from time to time and when it gets reduced to a mass where you see bubbles all over keep stirring the mixture continuously from this point on.


Here is an useful tip. At this point transfer it to a non-stick pan and use a masher to mash the content continuously . Non-stick pans reduces the chances of  scorching. Once the mass is dried up add the remaining  ghee saving a bit for greasing the plate on which you would set it and mix well .

Transfer to the greased plate and make a rectangular block and stud it with blanched halved pistachios and leave it to set at room temperature for 1 hour to 2 hours . Never ever set it in the refrigerator which dries out the Kalakand. Cut squares and enjoy this delightful dessert.


Tips :-


  1. You must use full fat milk else the taste will be compromised upon 
  2. The leftover whey used to cook curries gives it a full bodied flavour and when used to knead chapati or make bread renders it extra soft 
  3. Use the pistachios on the Kalakand while its warm so that it remaisn studded once the Kalakand sets the nuts won't remain intact on it.
  4. Enjoy a bit of warm Kalakand as suggested by the creator's descendants. It tastes amazing when served warm. 
  5. Using the masher ensures that the cottage cheese is evenly distributed and does not form any big lumps anywhere. In case you don't have a masher use the back of a big ladle to use it for the mashing effect. 
  6. For storing it , do use an air-tight container and then put it in the refrigerator. I would personally suggest eating it as fresh as possible but in case you are storing ti the air-tight container helps in retaining the moisture. 
Source of information 

Tehelka 
The Hindu 

This is part of Kolkata Food Blogger's ongoing event Deepavali Festival of Lights with Sweets and Savouries


Thursday, October 16, 2014

Pan Seared Chicken

Pan Seared Chicken 


On a regular day I prefer having fish or chicken which is either steamed, boiled, poached or grilled . And I love grills but here in our temporary house in Bombay we have no oven which I personally feel is just sad but then again a girl needs to eat.

I was dillydallying when a lovely person whose food posts I admire posted this delightful picture of pan seared chicken legs. I immediately knew what I was having for lunch. The idea was enough and I didn't need a recipe to follow. Its pan seared and I suggest using a non-stick pan.

I am sharing my recipe but you can always alter the flavours as per your taste :-

Serves 2

2 chicken leg + thigh without the skin
4 tbsp finely chopped leek leaves
Spray of olive oil
1 tsp fresh thyme leaves

For the marinate :-

1 tsp whole black pepper
1 tbsp Worcestershire sauce or any other vinegar
1 fat clove of garlic
1 tbsp olive oil
Salt as per taste

Make a smooth paste of the ingredients for the marinate and make gashes on the chicken and marinate and leave aside for 1 hour.

Lightly spray a non-stick pan with olive oil and add the finely chopped leek and add the thyme and palce the chicken and seal its juices on high heat for 2 minutes on either side and then cover, lower heat to minimum and cook for 3 to 4 minutes on both sides, till its thoroughly cooked. Remove cover and cook for a few seconds on high heat so that it becomes dry and then let it rest for 1 minute and  serve it with your favourite side dish. I served mine with some crisp salad.


Monday, October 13, 2014

Malai Chop and an aunt's Love

Malai Chop and an aunt's love


I can just call this my Calcutta Connection. Well I'l be honest once you start making sweets at home it becomes an addiction. I am passionate not just about sweets but about cultures because for me it through food that I can communicate with the entire world.


'Malai Chomchom' is a much loved sweet dish from Bengal where flattened or cylindrical shaped cottage cheese is boiled in thin sugar syrup and then soaked in slightly thickened milk. It is an absolute delicacy but then the recipe I am sharing today is extra special for me. I have a beautiful aunt who would often come over to our place with a big case of delightful  white Malai Chomchom but these malai chom choms had a coat of milk which was thickened enough to stay put on the white beauties. Now that I think about it I haven't ever paid attention to the name of the shop from where my darling aunt would bring one of my favourite sweets but now I can easily make it at home and so can anyone who is reading this.


Sitting in Bombay I miss Kolkata and so on an ordinary Saturday I decided to make these sweets from my memory. Having previously made roshogollas , pantuas, chanar jilipi , jalebi I was more or less confident enough to not consult any recipe and my confidence was well rewarded with a husband who usually doesn't like sweets yet gobbled up 3 and 3/4th malai chomchoms out of the 5 that I made 

Makes 4 Malaichochoms and a semi mini malai chomchom

1 litre full fat milk and it must be full fat
7 tbsp sugar
3/4th tbsp vinegar diluted in 3 tbsp water
1 tsp sugar
3/4th tsp semolina
tiny pinch of bi-carbonate of soda

For the syrup
1/2 cup sugar granules
5 cups of water
2 green cardamom

2 tbsp pistachios blanched and finely chopped

Start a day ahead by first making the condensed milk. Simply take 500ml of the milk and 7 tbsp sugar in a heavy bottomed pan and simmer it on low flame stirring it from time to time. Once the milk turns beige , thick and starts bubbling you must keep stirring it continuously and then cool it and blend it in the food processor / mixer grinder. Chill it in the refrigerator. The process takes about 45 minutes to 50 minutes.

The next day bring the milk to a roaring boil and lower the heat and add the diluted vinegar and let the cottage cheese form well so that in the end you have snow white cheese floating in a green liquid. It takes 2 minutes. Now switch off the gas-stove and cover and leave for 5 minutes . Then gather the cheese in a cloth and drain it for 15 minutes to 20 minutes and then take the cheese on a wooden board and knead well rubbing the cheese against the wooden board and gathering it and kneading it. After 3 minutes of kneading add the semolina , baking powder and 1 tsp sugar and knead well. Knead well for a good 15 minutes. The softness of the dessert depends entirely on the kneading. Make a large ball and divide it into 5 parts and make discs out of them.

Now bring the sugar and water to a boil and add the green cardamom . make sure that the pan is large enough to hold all the cheese discs side by side. Lower the heat and add the discs and cover and boil on medium heat for 15 minutes. It is essential that you keep lowering the temperature and increasing it in-between. Once done keep it covered for 10 minutes to 15 minutes and then take off the cover. Once the discs cool down place them on a tray and soak them with the thick condensed milk and garnish with pistachios and chill for 4 hours to 5 hours before serving.

Enjoy these soft milky creamy delights.

Very important tips :-

  1. It is extremely important that you use the tiniest pinch of bakign soda else your discs will break when they are being boiled in the syrup. 
  2. The softness of the discs depends entirely on the kneading , so knead as much as possible , your dough should be melt in the mouth and ultra soft 
  3. When you make the syrup remember that it is the thinnest syrup possible so once the sugar gets dissolved in the water after you have started boiling it immediately lower heat and add discs.  


This is part of Kolkata Food Blogger's  Ongoing event 'Deepavali, Festival of Lights with Sweets and Savouries'


Saturday, October 11, 2014

Soft Homemade Cottage Cheese Salad

Soft Homemade Cottage Cheese Salad 


Indians do not traditionally use a lot of cheese in their food but there is one cheese which is used extensively in India and that is Homemade cottage cheese aka Paneer in India. The truth is most people buy the readymade paneer these days but then again readymade paneer can never match up to a well made homemade paneer. Basically it is split milk clustered together and then drained of all its water to make firm cheese.


In Bengal people are more specific with this homemade cottage cheese for Bengal has an intense love affair with cottage cheese as is proven by the extensive use of cottage cheese known as 'Chana' not 'Chena' in Bengal. Not only do they make the softest chana ever they use it in one other form which includes kneading the cheese really well.

Now recently there has been an increased popularity of flavoured Paneer which I love but quite frankly paneer as a whole is firm in nature and on this particular day I wanted a soft melt in the mouth cheese without the calories that come along with most good cheese.

I was struck by this idea and I put it to good use with a very satisfactory result. Basically everything remains the same except for the technique.


So here is the recipe :-

Serves 2

For the Cheese:-

1 litre toned milk
1.5 tbsp vinegar diluted with 2.5 tbsp water
Wooden platform for kneading

For flavouring :-

Herbs of your choice, I used rosemary
Salt as per taste
Chili flakes or freshly ground pepper

For the salad :-

4 cups of assorted shredded lettuce
2 green apple

For the dressing

1 tbsp extra virgin olive oil
1 tsp freshly ground pepper
2 tsp white wine vinegar
Salt as per taste
1 large clove of garlic finely minced

Bring the milk to a roaring boil and then lower the heat and add the diluted vinegar. Within 2 minutes white cheese will be floating about in green whey. Now switch off the stove, cover the pot and leave for 5 minutes.

Now gather all the cheese in a cheesecloth or muslin cloth and wash it under cold water squeezing out all the water after you are done washing . If it still feel too hot for sqeezing out the water let it hang for 15 minutes.


Now start kneading the crumbly cheese , knead it well for 5 minutes , add the flavouring and keep kneading for another 10 minutes to 15 minutes (Remember that the more you knead the softer your cheese will be) and then make a fat roll and tie the cheesecloth after squeezing it well so that it is moist but not wet and leave it to rest in the refrigerator for 1 hour.


Now toss your salad. Whisk the ingredients for the dressing to make an emulsion and carefully slice the cheese. It is ultra soft and as a result it may break a little bit but its so soft that you can make perfectly shaped cheese cubes or balls or discs using clean hands, something which I did not do.


Enjoy a healthy meal.

Tips


  1. Kneaded on a wooden surface does result in a softer texture. I can vouch for this from experience.
  2. When you are kneading the cheese try rubbing it well against the wooden surface and then gathering the cheese with the sides of your finger and palm. 
  3. Since you are using your hands make sure its absolutely clean for hygienic purpose 

Friday, October 10, 2014

Oriental Black Pepper Chicken

Oriental Black Pepper Chicken 


They say necessity is the mother of all invention. For this particular recipe it was bottles of sauces beyond their expiry dates being sold at Big Bazaar which led to the creation of the sauce, well that along with my strong love for Calcutta's Chinese dishes which are on the verge of extinction.


So here goes the recipe for Oriental Black Pepper Chicken

Serves 2 :-

200gm to 250gm chicken de-boned breasts
Salt as per taste
Rice flour or corn flour  for dredging
2 cups of chopped Chinese cabbage
1 tbsp oil (Sesame or refined)

For the marinate sauce :-

2 tbsp soy sauce
1 tbsp rice wine vinegar
2 tbsp black pepper
Salt as per taste (I used 3/4th tsp)
1 fat clove of garlic
1 tsp Sesame oil or refined oil

Start by making a smooth paste of the ingredients for the marinate sauce. Transfer it to a bowl and mix very well. Then make small cubes of the chicken and use half the marinate and let it marinate for 1 hour to 2 hours.

Now heat the oil in a non-stick pan. In case you are not using a non-stick pan use a bit of extra oil. Dredge the chicken in rice flour / corn flour and saute on high heat to seal the juices and then turn down the heat and cover and cook for 40 seconds on each side. It should be golden brown by the time you are done with both the sides. Leave it to rest.Now add the remaining  marinate along with 3/4th cup water and bring to a boil and add salt after tasting. Simmer for 2 minutes and add the chicken and cabbage and simmer covered for sometime.

In case you want a thick sauce, mix 2 tsp flour / cornflour with a bit of water to create a smooth paste and add to the simmering sauce before adding the chicken and cabbage.


Enjoy it with steaming hot rice


Tuesday, October 7, 2014

Silky Chicken Meatball Rice Noodle Soup


Silky Chicken Meatball Rice Noodle Soup 


This is my comfort food. The truth is while India is definitely the land of spices in a small part of the beautiful city of the erstwhile Calcutta there resides the beautiful people who had immigrated from our neighboring country famous for its noodles and Kung Pao Chicken and made Calcutta their home  some centuries ago .

The truth is while the popularity of Chinese cuisine has spread far and wide , that what is served as Chinese food can sometimes be outrageous. To be fair having spent an entire Childhood visiting these tiny Chinese eateries which held on to their tradition with a firm hand I had the good luck and opportunity to get a glimpse of Chinese cuisine one which is extremely healthy, one which emphasizes on flavours infused by the fresh ingredients used and one which is soul warming and extremely hearty . Sadly with most of our Chinese population leaving Calcutta and these tiny joints shutting their shutters forever I can slowly see my favourite cuisine disappearing from Calcutta.


Even today there are a few eateries in Central Calcutta's old Chinese settlement which serves amazing traditional Chinese food. Here we must remember that having settled in Calcutta some dishes might have been adapted from the traditional ones served in China yet these eateries serve their own traditional dishes creating a tradition of their own.

One of Chin Wah's delightful offering is the meatball soup, tender, juicy succulent its a treat indeed and the flavour of garlic and ginger with a few greens (mustard green, pak choy etc) makes it one of my favourite soups ever.


Sitting in Mumbai I decided I wold make as much use of the internet as possible and create silky soft chicken meatballs. A bit of reading later I found this amazing site called, neckredrecipes.

I adapted their recipe for Chicken meat balls and made a divine lunch of Chicken meatballs and rice noodle soup

Here is the recipe which serves 2

300gm chicken breast
2 tsp ginger garlic paste
7 to 8 baby carrots (In case you don't find baby carrots use 1 large carrot and julienne it)
1 mediium sized pak choy
half a stalk of spinach
1 spring onion
Salt as per taste
100gm to 150gm of rice noodle
150m of ice cold water
1 tbsp rice wine vinegar
1 tbsp rice flour or cornflour

Chop the chicken in small pieces and blend it in a mixer grinder of food processor and then add 2 tbsp water, salt and 1 tsp ginger garlic paste and blend well to form a smooth paste. Now mix it well with the cornflour or rice flour and let it chill for 2 hours in the refrigerator.


After 2 hours make little balls (13 balls) from the meat paste and then bring a big pan of water to a boil and then add salt and simmer the water and add the meatballs and wait till they float and cover and simmer for 2 minutes and immediately transfer them to a bowl filled with the ice cold water. Soak the rice noodles as per instructions on the packet.


Now in the same pan in which the chicken balls were boiled add the remaining ginger garlic paste , carrots, the root of the spring onion sliced into 4 parts  and root of the pak choy which you must slice thinly and simmer for 7 minutes to 10 minutes and then add the noodles and the spinach and pak choy leaves and boil for 1 minute and add the chicken balls and boil for 50 more seconds and have a hearty meal.


Poached chicken breast salad

Poached chicken breast salad 


Most people who love chicken love a tender moist juicy chicken breast but most of us have gone through that time when we have cooked breasts and the end result was dry and stringy chicken breast.

I have personally misunderstood chicken breasts and when it turned out dry and stringy had made it worse by cooking for some extra time. Then at a point when I was frustrated and considered myself a failure with chicken breasts I decided to read up a bit and the information stunned me.  I was completely wrong. Truth is chicken breasts are delicate and they need the minimum of time to give you juicy succulent results.

Even after reading about it I did not get immediate success because the time given in most recipes was too much time for the chicken breasts I was cooking leaving them a bit stringy. Finally after a few attempts I understood what can always result in that juicy tender result and haven't looked back since then.


Here are a few important points to be remembered when dealing with chicken breasts :-


  1. Chicken breasts are very delicate and they need very little time for cooking
  2. Resting the breasts is as important as cooking it right. Truth is it is full of fibre and when you are cooking it the fibres stand out which when rested clubs together to give you tender results. 
  3. Lastly if you keep the two points mentioned above in your mind you shall soon discover how easy it is to know the amount of time required.  
  4. You may poach, saute , bake, grill or coat the breasts with flour and saute it.
  5. No matter how you are cooking the chicken the pan you use must be as small as possible to just about fit the chicken. (This tip was given by a lovely lady who is a great cook indeed, Claudia Barbara Tanna who runs My Continental Kitchen which gives you a chance to interact with other passionate cooks who love European, American and World Cuisine )  


Here is a salad which is tasty and healthy 

Serves 1 


Half of a chicken breast weighing about 120gm to 150gm
Half of a red bell pepper
Half of a yellow pepper
1 cup torn iceberg lettuce

1 tsp olive oil
1 large clove of garlic
1 tsp finely chopped fresh parsley
1 finely chopped  ripe red chili
1 tsp extra virgin olive oil
Salt as per taste

Lightly smash the garlic , peel it and then take a small pan and place the chicken, fill it with enough water to just about immerse it and add salt, crushed pepper and the smashed garlic and put over medium to low heat and simmer covered for 3 minutes to 5 minutes. Timing is very very important. Take it out  and place it in a small bowl and cover it and let it rest for 5 minutes. You can also let it rest by wrapping it in foil or a kitchen towel.

Here I must admit that at times I let it rest in the same pan in which it is cooked and it usually still leaves the chicken moist and tender but for that you have to make sure that the pan can be covered well and has no gaps and in these cases I have cooked the chicken for exactly 2 minutes to 3 minutes and then let it rest  for about 7 minutes to 9 minutes after turning off the stove because here the trapped steam cooks it from inside out but doesn't over cook it.

In the meantime shred the lettuce and chop the bell peppers. Take out the garlic used for poaching and mine it.

Now slice the chicken. Heat the olive oil and add the garlic and chicken breasts along with salt and the chili and saute for 50 seconds and mix with the greens and your salad is ready after you drizzle it with the extra virgin olive oil and add the finely chopped parsley.

Have a healthy meal